Pages

Showing posts with label Training. Show all posts

27 November 2010

Change of Watch Uniform Preperation for the Tropical Blue Long.


Here are some tips to help prep your Tropical Blue Uniform to give it a more formal look for those members who don’t own Winter Dress Blue or Service Dress Blue uniforms. In this article, we will look at pressing your uniform, adding military creases, and tricks for installing your attachments.

PRESSING AND CREASING YOUR UNIFORM SHIRT.

Step 1. Pressing the Shirt.

a. Iron with steam and let cool.

b. Starch with no steam to get wrinkles out (do a panel at a time).

c. The Yoke (figure 1) will need two be starched twice at this step as well as the epilates and collar. This will not be starched later and will help pop your military creases on the back.

Step 2. Adding the military crease to the front on the shirt.

a. The crease will run right through the shirt pocket button. Measure this distance from the edge of the shirt to the button (see figure 2) This will be the distance from the top to the bottom of the shirt.

b. With no steam very lightly press the crease from the button down to the bottom of shirt.

c. If you feel the crease is right, press with steam.

d. Now starch and iron twice to set the crease.

e. With no steam very lightly press the crease from the button up to the top of shirt and repeat steps C and D.

f. Repeat step 2 for the other side.

Step 3. Sleeve creases.

a. Fold the sleeve in half with the seam at the bottom of the shirt.

b. Lightly crease the shirt with no steam.

c. If you feel the crease is right, press with steam.

d. Starch twice and flip the shirt and starch the backside twice.

e. Repeat steps A, B, C, and D for the other sleeve.

Step 4. Back Creases (DO NOT CREASE ABOVE THE BOTTOM SEAM OF THE YOKE, SEE FIGURE 3)

a. Fold the shirt in half to find where the middle crease will go. This step should be taken with care. This will make your creases straight or angled. (Align the side seams to get the straight crease). (See figure 4).

b. Once the middle is found, lightly crease with no steam.

c. Press middle crease with steam to set temporarily.

d. If you have a DVD case, you can use it to set the width of the other two creases along the back.

e. Use the DVD case width to find your crease and slowly press the crease with the dry iron.

f. Press side crease with steam.

g. Repeat steps E and F for other side crease.

h. Start from one side and starch each side of the crease twice.

i. Work your way to the middle and then the other side by following step H.

Now your shirt is squared away and you’re ready to install your attachments.

ATTACHING YOUR INSIGNIA AND DEVICES.

Set you’re ironing table up with a towel folded a couple of times laid on top. Have some white cardboard, a pair of scissors and a ruler (I like to use a clear ruler).

Cardboard will be used behind the attachments to suck them to the shirt which will stop the drooping appearance. A good starching job to the shirt helps keep this from happening as well.

Step 1. Nametag (If you have an AUXOP device follow step 2)

a. First cut a piece of cardboard the same size as your nametag and set aside.

b. A quick method of finding the general area is to align the name’s middle letter (JAMES would be “m”) with the crease and place your name tag so the clutch posts are parallel with your uniform and the bottom of the name tag is against the top of the pocket. (Clutches pointing towards the top of your shirt).

c. Roll the name tag and push the clutch posts through the shirt. This should be close to the ¼ inch spacing from the top of the pocket.

d. Now fine tune the spacing with the ruler.

e. Place the cardboard piece you cut earlier inside of the shirt and align with your name tag and push the clutch posts through the cardboard and secure the clutches to the posts.

f. Check for alignment.

Step 2. Ribbons and Insignia/devise (if you only have ribbons, follow steps A through F of step 1)

a. Start with your ribbons and follow steps B, C, and D of step 1.

b. If you have any other insignia/devise follow steps B, C, and D of step 1 using the ribbons like you would the top of the shirt pocket.

c. This step is a little trickier then with your name tag. Take a piece of cardboard (this piece should be white) and place on top of your ribbons and device. Cut cardboard to the general size and then attach like step E and trim as necessary.

d. Once cut to size, attach clutches and check for alignment.(See Figure 5)

I hope these steps will help you ready you’re uniform for the Change of Watch. If you have any questions about getting your uniform ready or any general uniform question, please send me an email.

20 September 2010

Multnomah County ARES Exercise

Members, we have an opportunity to participate in the Multnomah County ARES (Amateur Radio Emergency Service) exercise on 09 Oct. 2010. This event will exercise the use of HAMS and the amateur radio bands in the event of an emergency. The participants will include, city and county emergency services and first responders.

We will be participating with the use of our ECP (Emergency Command Post) on top of Mt. Tabor. We will be on the air from 0800 to 1300 (last known time). Operations will include the Marine VHF-FM, Amateur-2 meter, Amateur HF, and possibly trying to call COMSPAC (USCG Communications Area Master Station Pacific) on HF.

If you are planning to participate in the communications exercise 16 Oct., with your ACU but would like to get some hands on use of the ECP, this is the perfect opportunity to do so.

If you would like to participate, please contact our FSO-CM Paul Ploeger. He will be in contact with the event officer, Jim Price and will forward any updates to you.

Depending on interest for this event, we may need to set up a schedule to allow members to participate without overcrowding the ECP.

Posted for FSO-CM Paul Ploeger, picture by Daren Lewis

14 September 2010

Changes to Ops & Position.

Shipmates, we have a new change with our ops and position reports to Station Portland. Up until now Statute miles was our means of identifying our location when giving our ops and position report. We have now been asked by station to identify our location by using landmarks or geographical location when making our reports. By doing this it allows us to streamline our operations with the goldside who have been using this method throughout the nation. It also allows the station's watchstander to better task us when SAR cases arise. Station trains using landmarks and therefore has a better understanding of our position when using landmarks for references.

I know this is going to be hard for some to change to this new method of reporting being this is how we have done it for years, but we have to make the best of it. I know we will help each other out as a team. I would like to remind members that correcting this new change should be done via land line. The radio is not the place to inform or remind members of the change.

Another allowable method of location can be LAT. & LONG. Use this when you are unsure of any landmarks or your geographical location. You will notice this is the method that the aircraft use.

Let us take a look at the old method of ops and position and then the new.

STATION: AUX123, this is Station Portland on 83A, request ops and position, over.
AUX: Station, AUX123, ops normal, down bound, Columbia River mile 109, over.

The new method of reporting would be.

STATION: AUX123, this is Station Portland on 83A request ops and position, over.
AUX: Station, AUX123, ops normal, down bound, position, 42nd Street Boat Ramp, over.

I will have a new radio script out in the next week or two with the changes. In the meantime, please see that you make the changes to your current script.

If you have any questions about this change, please contact FSO-CM Paul Ploeger or SO-CM Jonathan James. We are both happy to help you through this transition and to answer any of your question.


Add Image

27 October 2009

Operations Safety: Ejections from boats - an update


Shipmates, The following appeared on MCPOCG Bowen's blog and, as we posted the initial message on boat ejections from Captain Harrop, I wanted to also post the follow-up message.
To all those who operate our boats:
On 12 June, I issued the attached Cause for Action and sought help distributing it to every coxswain in the Coast Guard. I was pleased with how many people helped in this effort. While I know not everyone has seen it, I do believe many have. It is still being used at BM school and at the Boat Force Command Cadre course and other schools and venues. It has been circulated widely throughout the Auxiliary and even in the Canadian Auxiliary. But more importantly, I want to thank every coxswain who has gotten a Coast Guard boat underway during the past 3 months.
The last ejection from a Coast Guard boat occurred on 22 July, exactly three months ago. Our coxswains have safely operated their boats for 90 straight days without throwing anyone out. They have logged over 170,000 hours of safe and effective boat operations in support of all Coast Guard missions. That is impressive. Next time you see one, please pass on my heartfelt thanks for a job done well. Bravo Zulu! Thanks.
Now is not the time to let our guard down. Please continue to encourage our coxswains to be vigilant. The Office of Boat Forces goal is to complete 2010 without a single boat ejection. Coast Guard coxswains operate in a very dangerous environment and we must do everything in our power to ensure they are enabled to bring their crews back safely. Please continue to do your part.
Sincerely, Capt Ted Harrop


Chief, Office of Boat Forces.

PS: To those who oversee or manage others who operate boats, I also thank you for your help and request you pass this along to those who do operate boats for you.

Captain Harrop is reporting good progress. I'd encourage all of our Coxswains and Crew to remain vigilant and watch out for each other. As a reminder here are a few strategies to manage the risk of ejection:
  • Communicate, communicate, communicate - Call and get a response to wakes, maneuvering, changes in speed, going out of the cockpit or going forward, etc.
  • Slow down: Operate at prudent speed for the conditions, situation and the capabilities of the vessel
  • Remind your crew to hold on and if possible sit down - seated is almost always better when at higher speeds
  • Keep crew off the bow except when operating at low speeds and only then when operationally required
  • Assure PPE is properly donned at all times including all buckles and zippers
  • When you find yourself loosing your balance or see a shipmate doing so bring it to everyones attention - this is an indicator that action needs to be taken

24 October 2009

Qualifications: Public Affairs Specialist I & II and Coast Guard Public Affairs Support Specialist

We are all Public Affairs specialists in the Auxiliary. Each of us, in the course of our duties, interacts with the public and represents the Auxiliary and the Coast Guard. We rely on the skills we've picked up over the years to make these interactions successful. Few of us have any formal PA/PR training or significant PA/PR business experience. Over the last few years the Auxiliary leadership has recognized the need to provide training for, and formal recognition of, our public affairs specialists.

There are three levels of Auxiliary Public Affairs Specialist (+1 since we are all PA)
  • Auxiliary Public Affairs Specialist
  • Auxiliary Public Affairs Specialist II
  • Coast Guard Public Affairs Support Specialist
Auxiliary Public Affairs Specialist (I)
There are two tracks to gain recognition as a PA Specialist (I).

1) Take the Auxiliary C-School AUX-12. [Definition: C-Schools are resident classes of 2-4 days with travel, food and lodging provided by the Coast Guard]  The current C-School schedule can be found here: http://cschool.auxservices.org/

For 2010 these classes will be held in:
  • CGAS Clearwater - February
  • CGAS Mobile - March
  • CG Yard-Baltimore - April
  • ISC Alameda - June 
2) Use the self-study method with online courses through followed by an oral board. Full details of this approach can be found at http://www.auxpa.org/parecog.html. There are four Auxiliary classes and you must also take ICS-100 through FEMA. The Auxiliary classes are:
  • Introduction to Coast Guard Auxiliary Public Affairs (AUX-20)
  • Coast Guard Public Affairs Specialist 2nd Class (AUX-22)
  • Journalism Basic (AUX-24)
  • Introduction to Digital Photography (AUX-26)
Links to these classes can be found on the National Testing Center website (you will need to create and account to take the classes): http://ntc.cgaux.org/TrainingCourses.htm

For ICS-100a see this post: http://www.flotilla76.org/2009/08/member-training-fema-incident.html

There is a study guide and a Personnel Qualifications Standard (PQS) for the PA Specialist qualification [Definition: A PQS is a manual which lays out the requirements for a qualification and tracks mentoring and your progress - this is the standard Coast Guard approach to qualifications and is being increasingly adopted by the Auxiliary for our qualifications]


Beyond PA(I)
Once you have completed the Auxiliary Public Affairs Specialist qualification you may pursue the Auxiliary Public Affairs Specialist II qualification followed by the Coast Guard Public Affairs Support Specialist qualification. These are also detailed at http://www.auxpa.org/parecog.html

These are great programs and I encourage you to consider pursing the first, or all of the qualifications. Attendance at AUX-12 would be particularly useful as this prepares you to participate as a mentor and oral board member for future members seeking the qualification.

08 October 2009

Reminder: Leadership Training Saturday 10OCT2009


(Embedded Video: Visit the post to see the video if you receive this via email)

I encourage all 76 members to attend the leadership training on Saturday, 10 OCT 2009 at 0830 on the training deck at Sector Portland. Ken Babick will be instructing. The uniform is Tropical Blue or Winter Dress Blue. Hope to see you there!

10 September 2009

Becoming a Vessel Examiner

UPDATED!

Vessel Examination is one of our cornerstone missions. By talking to boaters while they are safely ashore or dockside, discussing requirements and recommended equipment we reduce the risks those boaters face once underway - we are doing preventative SAR before the boaters get in trouble.

Vessel Examination is one of the easiest of our missions to accomplish as it does not require any equipment or scheduling - you simply need to be qualified, the forms and to be present where boaters congregate.

So how do you become qualified?
  1. Request a VSC Manual M16796.8 or download a copy here.
  2. Download Forms ANSC-7003, ANSC-7008, ANSC-7012, ANSC-7038 and ANSC-7045 here.
  3. Download the Auxiliary Operations Policy Manual here.
  4. Study the entire VSC Manual, the forms and the sections of the Auxiliary Operations Policy Manual concerning requirements for surface operational facilities.
  5. Take the VE test at the Auxiliary National Testing Center.
  6. Conduct five mentored vessel examinations with a currently qualified VE mentor. 
  7. The mentor VE will file a 7038 showing you as a trainee with the FSO-IS for entry into AUXDATA. As with any form which includes your activity you should request a copy.
  8. The mentor will also complete a D13 Request for VE Certification which is sent to the District Staff Officer for Vessel Examinations (not the DIRAUX).
  9. Once you receive notification of qualification.... get out and do Vessel Exams.
As noted previously please inform the FC, VFC or FSO-VE by phone or email when you are planning to do exams to insure you are properly assigned to duty and under the (qualified) umbrella of USCG legal protection.

05 September 2009

Four months to the new year: Check your qualifications

With four months to the end of the year it is time to start thinking about currency maintenance for your qualifications with currency or class requirements. These include:

  • Boat crew, PWC operators and coxswains
  • Pilots, air crew and observers
  • Instructors
  • Vessel examiners
Each qualification has particular requirements for currency. Generally you are responsible for keeping track of your tasks. If you have questions please ask the Member Training Officer.

Hopefully we are all getting enough time/missions on each of our chosen qualifications that currency isn't an issue but it is easy to miss a required class or workshop. Please don't let it wait until the last minute.

31 August 2009

Member Training: FEMA Incident Command/NIMS/NRP Courses (IS-100/200/700/800)

One of the first things we tell many new members to do is to start work on your "FEMA classes" or your "ICS" courses. We do this for a number of reasons:
  1. Many qualifications require two or more of these courses.
  2. You can take them right away, there is no need to wait for your member number.
  3. They get new members started with something substantive but, as they are produced by FEMA for a wide audience, something that does not require any specific knowledge of the Coast Guard or the Auxiliary.
  4. (This is my secret reason) These courses encourage use of plain English and they encourage new members to ask questions when we fall into our own particular patois, "Auxiliaristesse". 
While there are many offerings from the FEMA Emergency Management Institute Independent Study program we are usually referring to four courses when speaking to new members:
  • IS-100.a: Introduction to Incident Command System - This course introduces the Incident Command System (ICS) and provides the foundation for higher level ICS training. This course describes the history, features and principles, and organizational structure of the Incident Command System. It also explains the relationship between ICS and the National Incident Management System (NIMS).
  • IS-700.a: National Incident Management System (NIMS) An Introduction - This course introduces and overviews the National Incident Management System (NIMS).  NIMS provides a consistent nationwide template to enable all government, private-sector, and nongovernmental organizations to work together during domestic incidents.

  • IS-200.a: ICS for Single Resources and Initial Action Incidents - This course is designed to enable personnel to operate efficiently during an incident or event within the Incident Command System (ICS). ICS-200 provides training on and resources for personnel who are likely to assume a supervisory position within the ICS. 
  • IS-800.b : National Response Framework, An Introduction - The course introduces participants to the concepts and principles of the National Response Framework.
These courses can be found here: http://training.fema.gov/IS/crslist.asp

The courses are conducted by self study and include online testing. The suggested order is 100, 700, 200 and finally 800. Your mentor and member training officer will work with you to determine which courses to take but there is no harm in completing the entire series as time permits - the completion does not expire.

Please note that completion of these courses is not communicated to the Auxiliary. To get these classes properly entered into your record please forward the completion email you receive to the Flotilla Commander and the FC will send it on to Charles Claytor in the D13 Auxiliary Office for entry. (Policy in other Flotilla may be different)

Please print and retain a copy of your certificate. It is also very helpful to retain a copy of the email from the FEMA Emergency Management Institute.

30 April 2009

D13 AUXAIR Fly-In

Shipmates,
This weekend is the Annual AUXAIR Training Weekend. Our own Gary Nepple is the AUXAIR operations officer and asked me to post two documents:

1) The agenda:
Flyin2009Agenda2.doc

2) His presentation outline:
POMS-Netskeds-7030's.doc

While you may not be active in AUXAIR it is often helpful to see what is occurring in other programs.

UPDATE Note: Uniform of the day for all on base activities will be flight suits or casual civilian. Saturday evening shirts & slacks. Sunday morning Casual Civilian or flight suits as appropriate.

28 April 2009

Bravo Zulu: 76 Crew candidates and all the Division 7 crew and coxswain candidates passing QE today

Updated and bumped: The same BZ to Roger and Tim who passed QE on Sunday! Way to go everyone.

A big Bravo Zulu to Paul, Chris, Shaun, Gary, and Kip from 76 who passed QE today and have been recommended for qualification as boat crew. Good luck to Tim and Roger who go before the QEs on Sunday. This is the culmination of over three intense months of study, class work and practical on the water work. You've done very well. Now you have the opportunity to get out on the water in regular operations and start the journey from competency, to comfort and hopefully to mastery at some point in the future.

My conversations with the QEs were highly complementary of all the crew and coxswain candidates.

I cannot say enough about the quality of the program that Flotilla 73, under the leadership of Don Verkest, provides.  Don has developed an outstanding schedule -- the on-the-water exercises always seem to come at exactly the right time to cement the classroom learning. I've a particular appreciation for the academy this year having gone from a somewhat casual relationship as a crew mentor to a coxswain candidate. My skills would not be anywhere near what they are had I used the self-study method. The 73 Crew/Coxswain Academy is a model that should be emulated nation-wide.

20 April 2009

Beyond the Basics: U.S. COAST GUARD ADDENDUM TO THE UNITED STATES NATIONAL SEARCH AND RESCUE SUPPLEMENT (NSS) TO THE INTERNATIONAL AERONAUTICAL AND MARITIME SEARCH AND RESCUE MANUAL (IAMSAR)

Shipmates,
When you find yourselves with a little time on your hands I recommend downloading and reviewing the U.S. COAST GUARD ADDENDUM TO THE UNITED STATES NATIONAL SEARCH AND RESCUE SUPPLEMENT (NSS) TO THE INTERNATIONAL AERONAUTICAL AND MARITIME SEARCH AND RESCUE MANUAL (IAMSAR) [11mb]. A long title for a very long manual but well worth at least a scan if you are interested in SAR as a surface operator, an air operator or a communicator. Our surface coxswains are familiar with Chapter 4 which discusses the come-upon policy but the manual offers a great deal more.

Beyond the practical material for executing search and rescue on an air, surface or land asset the manual will give you a much greater appreciation for what our shipmates in the concrete box of the Command Center are doing. Enjoy.


PREFACE AND PROGRAM OVERVIEW
I Mission and Purpose
II Risk Management
III SAR Functions & Hierarchy
IV Statutory Authority & Responsibility
V SAR Publications
VI SAR Program Objectives, Goals, Standards and Requirements
VII SAR Program Focus
VIII SAR System Infrastructure
IX Terms Within the Addendum
X Applicability and Obligation
CHAPTER 1 SAR SYSTEM
1.1 Search and Rescue (SAR) Organization
1.2 SAR Coordination
1.3 Professional Requirements
1.4 Public Affairs & Next of Kin Interactions
1.5 Liaison and Contingency Exercises
1.6 Agreements
CHAPTER 2 SAR COMMUNICATIONS
2.0 Introduction to Communications
2.1 Global Maritime Distress and Safety System (GMDSS)
2.2 Digital Selective Calling (DSC)
2.3 SafetyNET Messaging
2.4 Maritime Mobile Service Identity (MMSI) Numbers
2.5 National Distress and Response System (NDRS) & Rescue 21
2.6 Urgent Marine Information Broadcasts (UMIBs)
2.7 Cellular Telephones and *CG
2.8 Electronic Mail
2.9 Lost Communications with a Coast Guard Asset
2.10 Recorded Radio Transmissions and Telephone Lines
2.11 Ship Security Alert Systems
CHAPTER 3 SEARCH PLANNING
3.1 SAR Planning and Operations Overview
3.2 Search Planning Methods and Tools
3.3 Search Planning Variables
3.4 Initial Response, Search Planning and Search Operations
3.5 Rescue Planning and Operations
3.6 Measures of Search Effectiveness
3.7 Aspects of Survival
3.8 Conclusion of SAR Operations
3.9 Case Documentation
CHAPTER 4 GENERAL SAR POLICIES
4.1 Maritime SAR Assistance Policy (MSAP)
4.2 Forcible Evacuations of vessels
4.3 General Salvage Policy (Other than Towing)
4.4 Firefighting Activities Policy
4.5 Direction and Navigational Assistance for Mariners
4.6 SAR Cost Recovery and Reimbursement
4.7 Emergency Medical Assistance
4.8 Justification for Non-Maritime EMS Response
4.9 Ice Rescues
4.10 Float Plans
4.11 Self-Locating Datum Marker Buoys
4.12 SAR and Security Concerns
4.13 Maritime Law Enforcement and Vessel Safety
4.14 Places of Refuge
4.15 Persons Falling or Jumping from Bridges
CHAPTER 5 COAST GUARD SEARCH AND RESCUE UNITS (SRUs)
5.1 Operations Overview
5.2 Surface Craft Operations
5.3 Coast Guard Boats
5.4 Coast Guard Cutters
5.5 Aids to Navigation (ATON) Vessels
5.6 Aircraft
5.7 Crew Fatigue
5.8 Rescue Swimmers
5.9 Passive Watchstanding
CHAPTER 6 PROCEDURES FOR UNDERWATER INCIDENTS
6.1 Underwater Incidents Overview
6.2 Submersibles
6.3 Persons Trapped in Capsized Vessels
6.4 Underwater Acoustic Beacons (Pingers)
6.5 Action Required for Underwater SAR Preparation
6.6 Scuba Diving Incidents
Appendix A Command SAR Library
Appendix B MISLE
B.1 MISLE System
B.2 Reporting Criteria
B.3 Responsibility
B.4 Action
B.5 General Data Entry Guidelines
B.6 Data Retrieval
Appendix C Standard CG SAR Messages
C.1 Situation Report (SITREP)
C.2 Search Action Plan (SAP)
C.3 Sample DSC False Alert Message Format
C.4 SafetyNET Examples
Appendix D MEDEVAC Report (CG-5214)
Appendix E Emergency Medical Services Agreement
Appendix F SAR Contingency Exercises
F.1 Introduction
F.2 Identifying Maritime Contingency Response Communities
F.3 Developing Maritime Contingency Response Plans
F.4 Exercising Maritime Contingency Response Plans
F.5 Requesting Support for Maritime Contingency Response Plan Exercises
Appendix G SAR Checksheets
Initial SAR Checksheet
Supplemental SAR Checksheet
Overdue Checksheet
MEDICO / MEDEVAC Checksheet
Grounding Checksheet
Flare Sighting Checksheet
Aircraft Emergencies
Abandoned or Adrift
Beset by Weather
Capsized
Collision
Disabled
Disoriented
Uncorrelated MAYDAY, MAYDAY, probable hoax calls, automated S.O.S.
PIW
SARSAT
Taking on Water or Fire
SAR Case Suspension Checklist
Mass Rescue Operation Supplemental Checksheet
Appendix H Search Planning Handbook
H.1 Search Planning
H.2 Manual Solution Model
H.3 Datum Estimation
H.4 Search Area
H.5 Search Plan Variables
H.6 Search Area and SRU Assignment
H.7 Search Pattern Selection
H.8 Search Action Plans
H.9 Manual Solution Worksheets
Appendix I Flare Incidents
I.1 Flare Incidents
I.2 Definitions
I.3 Obtaining Sighting Data
I.4 Estimating Distances
I.5 Determining a Datum Area
I.6 Mission Conclusion
Appendix J Emergency Position Indicating Radio Beacon (EPIRB) Registration Form
Appendix K Bibliography
Appendix L *CG Agreement
AppendixM COMSAT-C Web Interface
M.1 Launching the Web service interface
M.2 SafetyNET Message Procedures
M.3 Shore to Ship Distress Alerts
M.4 Search and Rescue Messages
M.5 Navigational Warning Messages
M.6 Compose Message
M.7 Delivery Status
M.8 Read Mail
M.9 Monitoring Messages
M.10 Canceling Messages
M.11 Sending a cancel notification
M.12 User Profile
M.13 Error Messages
M.14 Back-up System
Appendix N SAR Controller Personnel Qualification Standard (PQS)
INDEX

29 March 2009

Keep your hands away from the cleat!

Shipmates,
No photos from our training on the water today, it was just too busy. The crew candidates did far better than I managed the first time out. Credit to the Academy cadre for really preparing folks for the on the water portion of our training.

I had a few notes for my crew today that I thought would be useful to share with everyone.

Couple of points to keep in mind:

- Keep your hands clear of the cleats. It takes practice but line handling where your hands don't approach the cleats is one of those things the QEs notice. See Earl's excellent example in a movie from last week.


- Associated with this, when the coxswain directs you to use a line that does not meet the needs of the situation bend another or ask for a new line. The coxswain will have dozens of things going through their head when line suitability issues emerge (e.g. docking, towing) so you may need to be particularly assertive.

- Now you've seen it done. Spend some time thinking about how these evolutions may work underway -- imagine the various evolutions, throw in some random occurrences and how you would respond. The best surgeons do surgery in their heads when out of the operating room (and likely in their dreams as well). The best operators have already imagined most of the situations they will face and gone over the options and response in their minds. Beyond these evolutions I'd challenge you to do the same kind of thinking about situations involving interactions with other crew members and your coxswain - build some situations where TCT is required. Build some situations where we are outside our capabilities and need to stand down or reorient so we can meet the objective safely.

- The stern tow is the one you need to do fast in our AOR, it is how we get people out of immediate danger -- like from out of the path of a tug. Whenever you get on a boat look to the stern tow gear, how are you going to lead it, is the bit or cleat you'll need clear, do I know what we'll be using as pendants (which become the #1 in a side tow) for skiff hook connections and for handing over a line, where is the heaving line, and do I remember how to bend the pendant to the tow line. Our side tows and other evolutions are more forgiving and you'll often have time to adjust. You all participated when we repositioned Ken's boat further aft in a side tow - we have the time to do this in most cases since we've already used the stern tow to get to a safe location with plenty of sea room.

- Have your quick release clove hitch for tying fenders worked out on rails, lifelines, hand rails, etc. It is the knot you will be tying to all sorts of different objects on different boats. If you only practice on a simulated rail in a horizontal position you may have difficulty on a vertical rail or a lifeline . When you are asked to move a fender the expectation is you'll have it done in under 15 seconds and be ready for the next tasking.

13 March 2009

Who Takes Care of the Rescuer?

I thought I would share an article regarding Critical Incident Stress.

Although it is aimed at the Diver, it covers situations and emotions we may experience.


http://www.alertdiver.com/articles.aspx?articleno=32&onpage=1

07 March 2009

8WR District Conference - by blog

Our shipmates in Flotilla 4, District 8 Western Rivers , are blogging and live blogging their District conference over the next few days.

Check out the Flotilla blog here

The live blog is on one of the member sites (likely because he has mobile access) here

Why does this matter?


  1. It is always great to see another Flotilla embrace the use of these new tools.
  2. The folks at Flotilla 4 may hear something, or have a different perspective, on the information that came out of NTrain that we've missed.
Bravo Zulu John Halbrook and the Flotilla 4, 8WR team. I'm stealing this idea for our next conference.

18 February 2009

Flotilla 73 Crew Coxswain Academy Test Movie

Flotilla 73 puts on an excellent crew and coxswain academy each spring here in Portland. We are about four weeks into the academy and I thought it would be fun to experiment with the video capability of my new Canon 5D MkII. We'll continue to shoot video as the academy progresses and try to most of the 35 students and  the few dozen instructors and mentors on film. Enjoy!


The video was shot on a Canon 5D MkII, edited in iMovie and with a soundtrack from GarageBand. See a full size version here

15 February 2009

Changes at the National Testing Center

At the District 13 conference National Vice Commodore Vass informed us there have been a number of changes at the Auxiliary National Testing Center to improve the usability of our test system.
  1. You may now take tests and unlimited number of times per month rather than the former 5. This change was made for members who had poor Internet connections which resulted in problems completing a test in a single attempt.
  2. The time limit for a given test has been changes from 3 to 5 hours.
  3. The question pool has been examined and questions with low rates of correct answers are now presumed to be poorly phrased or confusing and will be reworked or eliminated.
Visit the National Testing Center at: http://ntc.cgaux.org/ 

18 January 2009

Ribbon precedence (order)

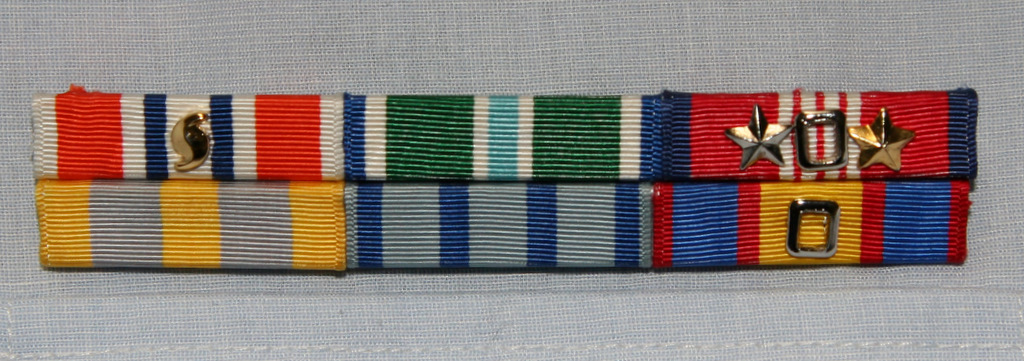
Correct wearing of the Coast Guard uniform includes correct wear of your awards. The proper order for your awards can be confusing for new members.

The Auxiliary Manual [COMDTINST M16790.1F] sets the precedence for awards received in the Auxiliary as well as prior service awards.

Luckily the Chief Director of Auxiliary provides an easy online tool to help you configure your ribbon bars, the ribbon checker .

Review the list, viewing awards using the "fx" button as required, and check off your Auxiliary awards and any prior service awards. Once you are finished the ribbon checker will display the proper order for you.

Finally, ask an experienced member to review your ribbon bar.

29 December 2008

January Division member training - dewatering pump demo and fueling review

The Division member training on Saturday 10 JAN 2009 will focus on two items:

1) a fueling review for all Coxswain and Coxswain candidates
2) a demonstration and exercise using the standard Coast Guard dewatering pump which is required for all crew candidates

The training starts at 0830 on the training deck at Sector Portland. The uniform is ODU.

Update 20:52: Chris R reminds me that this should read 2009 not 2008. Thank Chris.

08 November 2008

Qualifications: Becoming an Auxiliary Instructor

One of the most rewarding opportunities in the Auxiliary is teaching others about recreational boating safety (RBS). To teach our public classes you need to be a qualified instructor (IT) or candidate for IT status.

Most Auxiliary qualifications, of which the instructor qualification (IT) is one, are moving to the standard for Coast Guard qualifications the Performance Qualification System (PQS). A PQS is a set of tasks and other requirements to gain a qualification. Once you have been qualified many qualifications require annual currency maintenance, which will be discussed in future posts.

How do you become an instructor?

1. You read/study the Instructor Development Course (IDC) text  found here. Note a study guide for the course can be found here .

2. You take the online IDC test at the Auxiliary National Testing Center (NTC) and pass with a score of 90% or better. Print out the email the NTC sends and keep it. (You will need to sign in and get a pasword for the NTC using your Auxiliary eDirectory password. If you don't have an eDirectory password visit the eDirectory and set one up.)

3. The student is assigned a mentor that is a currently qualified Instructor and the mentor takes the student through 19 Tasks and signs off that the student knows and understands the tasks. (IDC appendix B-4 )

4. The student then presents a 10-30 minute lesson and a 1-2 hour lesson. The mentor evaluates the presentations using the "Instructor Qualification Check List" and then the "Instructor Evaluation Sheet" (appendix C-3 thru C-7 )

4. The mentor and the Flotilla Commander then certify the process by completing the "Certification of Instructor" form on appendix B-6 .

5. The  Flotilla Commander will then submit the "Certification of Instructor form" and a copy of the email response showing the score on the test and that the member passed by 90% to the District Staff Officer for Public Education (DSO-PE) for review. The DSO-PE will then recommend to the DIRAUX that the member be qualified.

6. Your certificate and ribbon will be sent to your FC for presentation at the next Flotilla meeting.